
Introduction to fixing broken plasterboard
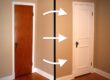
Got a hole or crack in your wall that’s making your space look like a construction zone? Don’t worry — you’re not alone. Plasterboard, or drywall as it’s commonly called, is durable but not indestructible. Whether it’s an accidental bump from moving furniture or a more serious impact, this guide will show you exactly how to fix it like a pro — even if you’ve never touched a toolbox before.
Understanding Plasterboard Damage
Common Causes of Plasterboard Damage
Plasterboard can break, crack, or crumble due to:
Impact from furniture or door handles
Water damage and leaks
Settling of the building
Poor original installation
Expansion and contraction with temperature changes
Types of Plasterboard Issues
Small dents and holes: Usually cosmetic, easily patched.
Cracks: Often caused by structural shifts.
Large holes or missing sections: Require cutting and replacing the damaged area.
Water-damaged plasterboard: Needs full replacement due to mold risks.
Essential Tools and Materials Needed
Tools Checklist
Utility knife
Drywall saw
Sanding block or electric sander
Drill or screwdriver
Taping knife
Measuring tape
Pencil
Materials List
Replacement plasterboard piece
Wood batten or furring strip (for support)
Joint compound (drywall mud)
Drywall screws
Joint tape or mesh
Primer and paint to match your wall
Safety Precautions Before You Begin
Before diving in:
Turn off electrical power if working near outlets or switches.
Wear safety goggles and a dust mask when sanding.
Clear the area of furniture and cover floors with a dust sheet.
Step-by-Step Guide to Fixing Broken Plasterboard
Step 1: Inspect the Damage
Take a good look. Is the damage surface-level or deeper? If it feels spongy or crumbly, it may be due to water and needs full replacement.
Step 2: Mark the Area
Use a pencil and level to outline a square or rectangle around the damaged area. Try to go slightly beyond the break so you’re working with clean edges.
Step 3: Cut Out the Damaged Section
Use a utility knife or drywall saw to cut along your marks. Be cautious not to cut into any wiring or pipes behind the wall.
Step 4: Add Support Behind the Wall
Cut a furring strip slightly longer than the hole and slide it into the wall cavity. Screw it in place from the outside edges to give your patch something to attach to.
Step 5: Cut and Fit a New Piece of Plasterboard
Measure the hole and cut a matching piece of plasterboard. Test the fit — it should sit snugly but not jam in.
Step 6: Secure the New Piece
Screw the new plasterboard patch into the wooden support. Make sure it’s flush with the existing wall surface.
Step 7: Tape and Apply Joint Compound
Cover the seams with joint tape. Then apply a layer of joint compound over the tape using a wide taping knife. Let it dry thoroughly.
Step 8: Sand Smooth
Once dry, sand the area until it’s smooth and even with the rest of the wall. You may need to apply a second coat of compound for a perfect finish.
Step 9: Prime and Paint
Apply a coat of primer to seal the repaired area. Once dry, paint over it with your wall color. Blend the edges for a seamless look.
Tips for a Professional Finish
Always feather the edges of your joint compound.
Don’t rush the drying process — it can cause cracking.
Match paint using a sample or take a photo to the hardware store.
Use mesh tape for added strength on larger repairs.
When to Call a Professional
Call in a pro if:
The damage is near electrical wiring or plumbing
It covers a large area
It was caused by structural issues or water damage
You’re not confident in your tools or skills
How to Prevent Future Damage
Install doorstops to prevent doorknob holes.
Mount shelves and heavy items using wall anchors.
Check for leaks regularly to prevent water damage.
Use corner guards in high-traffic areas.
Conclusion
Fixing broken plasterboard isn’t rocket science. With the right tools, a little patience, and this step-by-step guide, your wall can be looking brand new again in no time. Remember — a clean, well-repaired wall can make your entire space feel fresh and polished. So roll up those sleeves, and get to work!
FAQs
How long does it take to fix broken plasterboard?
A small repair can be done in 1–2 hours (excluding drying time). Larger patches may take a full day or more.
Can I patch plasterboard without cutting it?
For small holes or dents, yes — joint compound alone can do the trick. Bigger holes need cutting and replacing.
What’s the best filler for plasterboard?
Use a joint compound or drywall filler specifically designed for plasterboard repairs.
How do I know if the damage is structural?
If you see deep cracks, bowing walls, or recurring issues, it may be structural. Consult a contractor or structural engineer.
Is it better to replace or repair plasterboard?
Small damage can be repaired, but waterlogged or heavily broken plasterboard should be replaced for safety and longevity.